Create Project
In the previous chapter, we learned how to set up the Angular 7 environment. In this, we learn how to create the project in Angular 7 using Angular CLI.
Now let's create our first project in Angular 7. To create a project
in Angular 7, we will use the following command –
To Set up Development Environment for Angular 7, we require the following
–
ng new projectname
We will name the project as ng new angular7app.
Setp 1:
First, create a folder name as Angular, on a desktop or wherever you want. Open
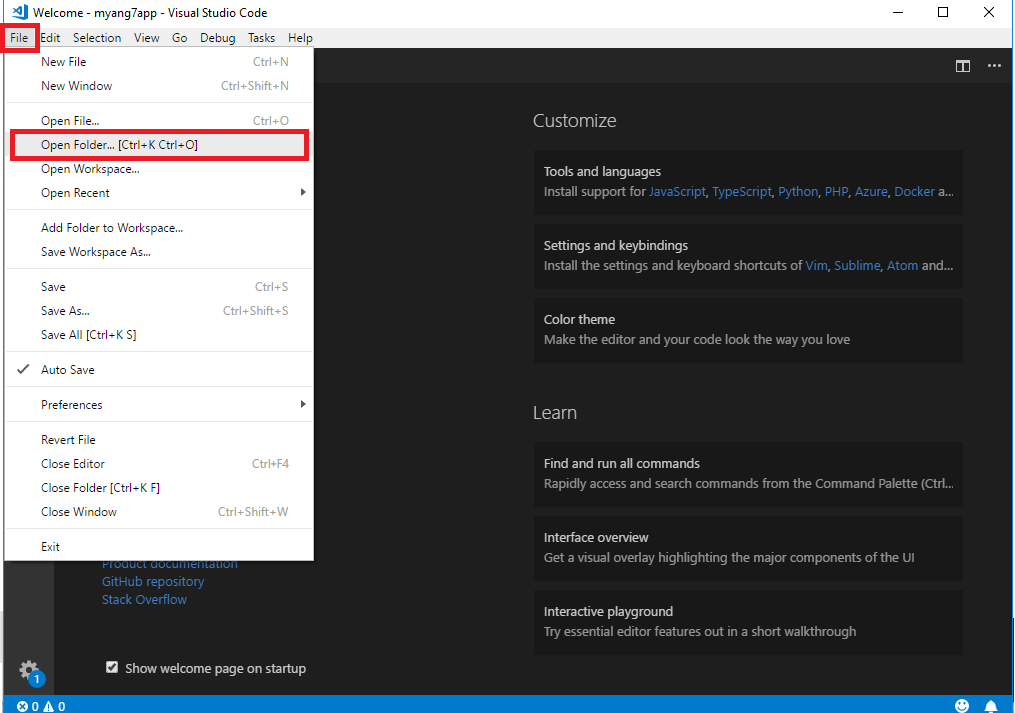
Visual code, click on File, go to "Open Folder (ctrl+O)" option and
then click on it.
Setp 2:
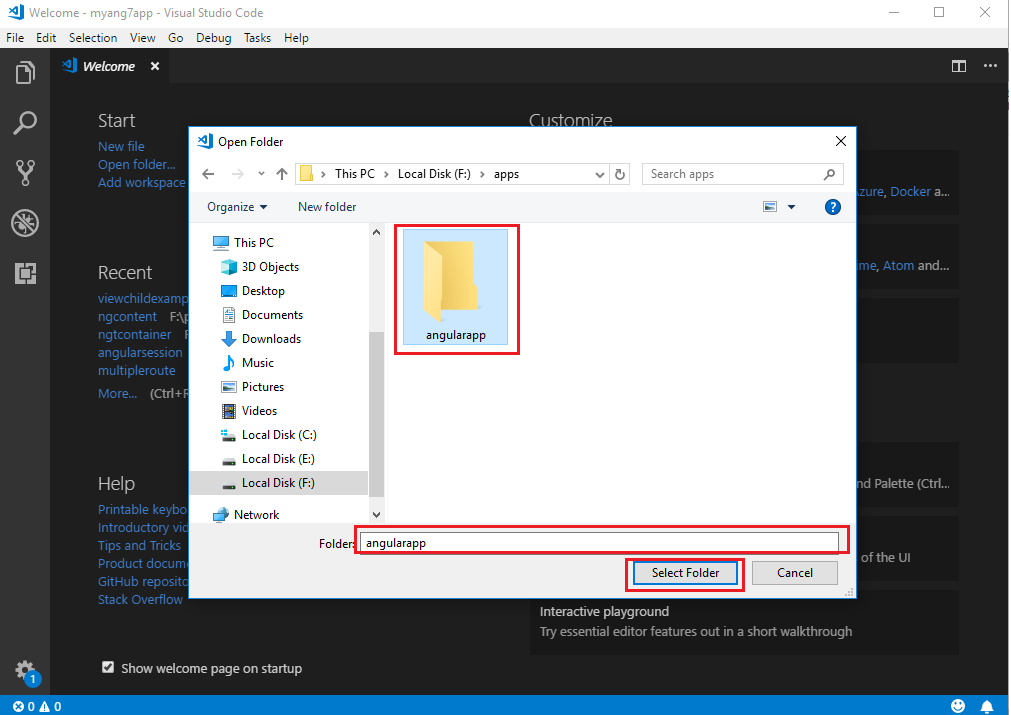
After that, a window will appear. Select the created folder and click on Select Folder box as shown in the below image.
Setp 3:
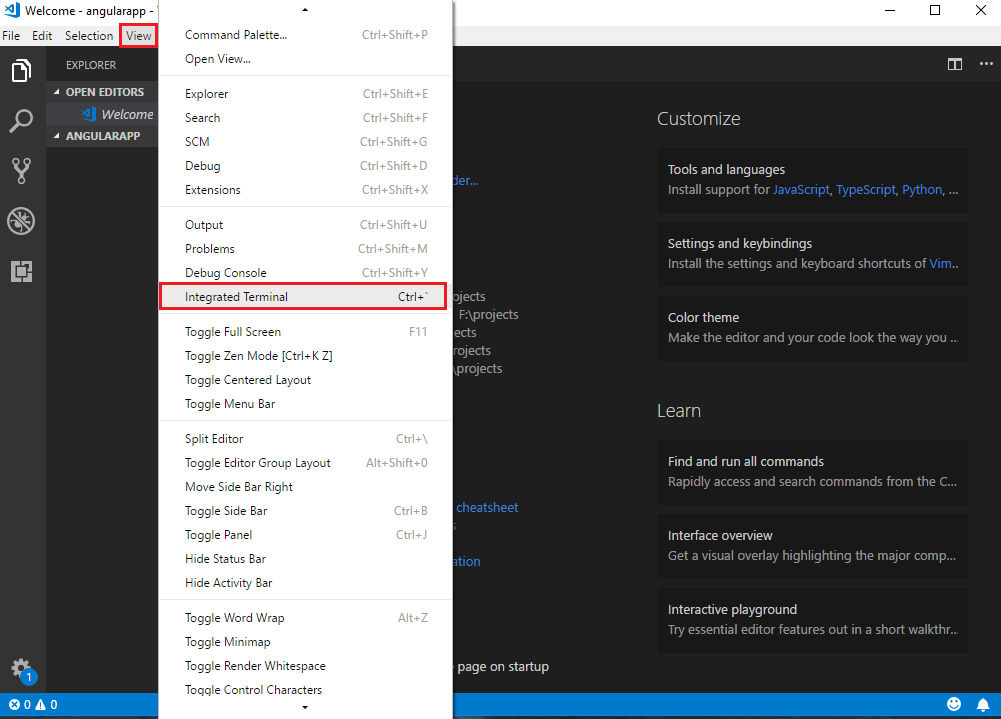
To create the application, click on the view, in the list select Integrated terminal and click on it.Visual Code Console will open.
Now run the ng new angular7app command in the command line.
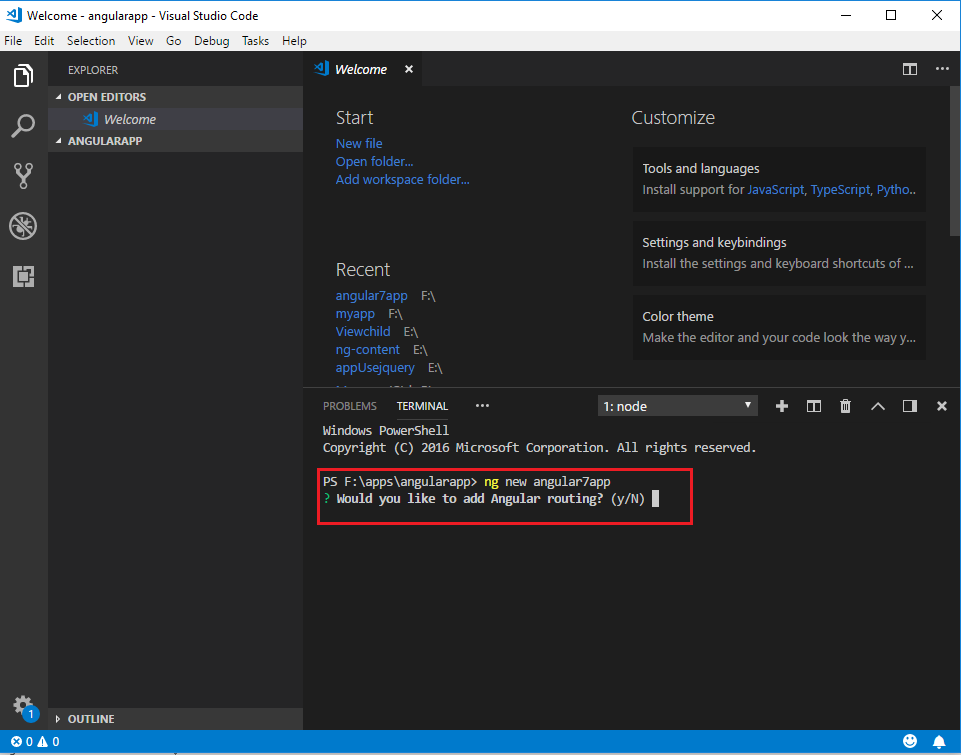
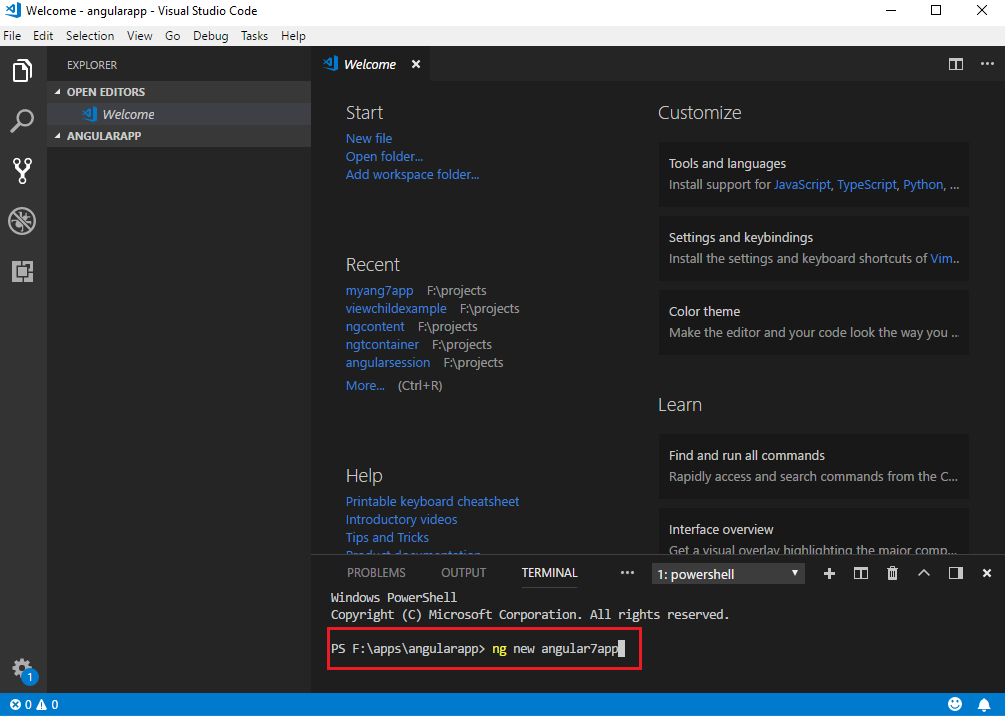 It's going to present you with a couple of questions before beginning: the Angular
CLI will prompt you with two options. The first option will ask you whether you
want to add
 routing support or not.
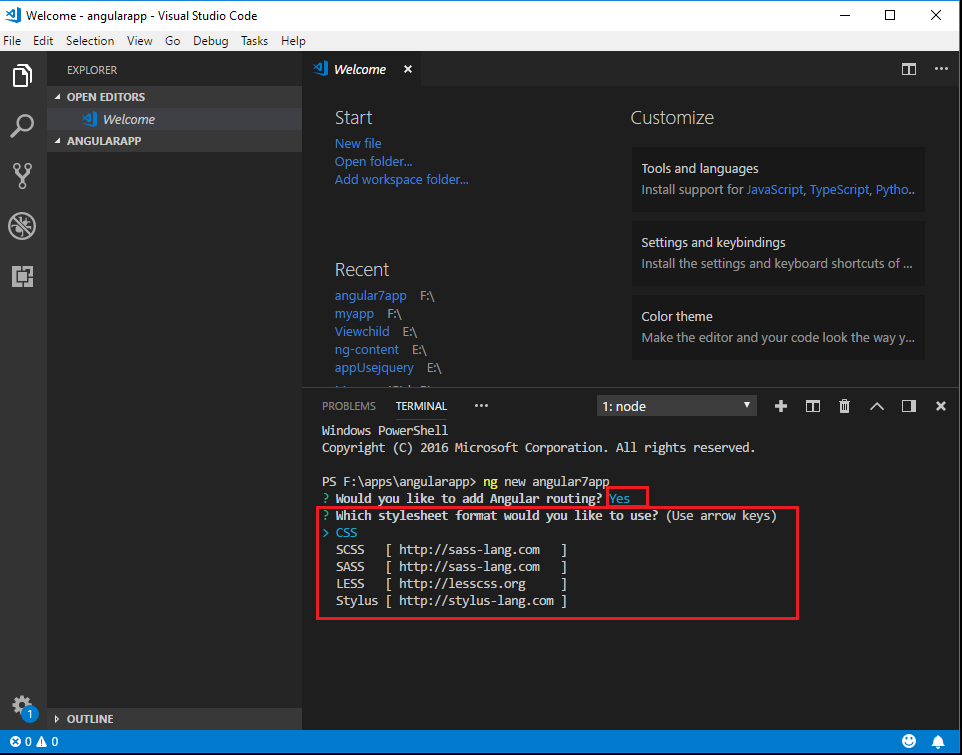
While the second option will ask you which stylesheet format (CSS,
SCSS, SASS etc.) you would like to use.
The project (angular7app) is created successfully. It installs all the required packages necessary for our project to run in Angular 7.
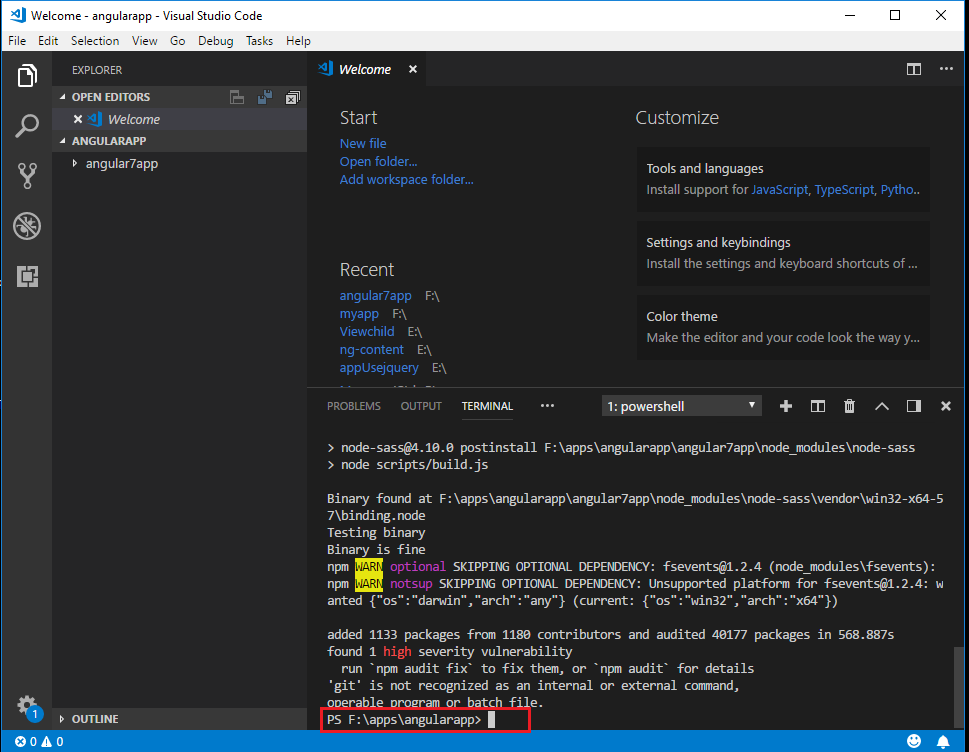
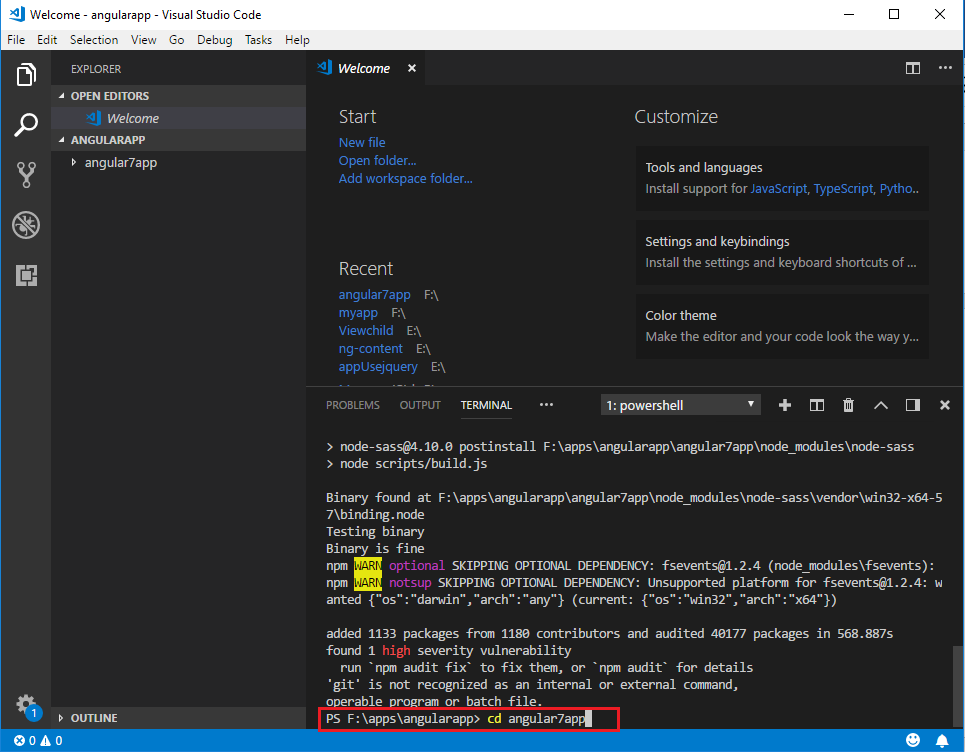
Let us now switch to the project created, which is in the directory angular7app.
Change the directory in the command line - cd angular7app.
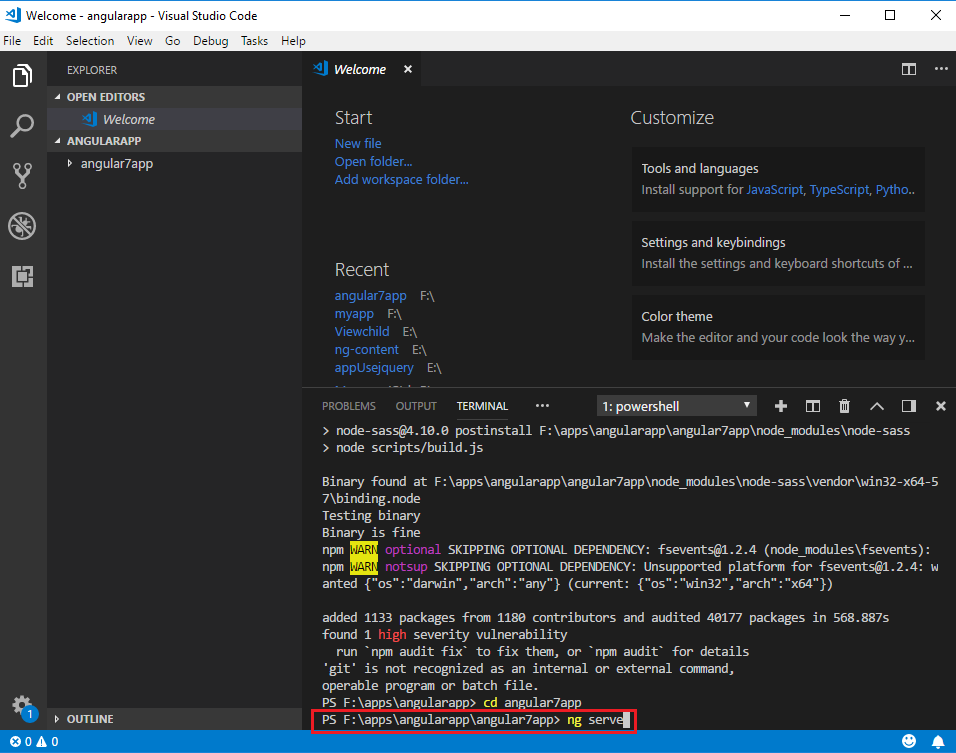
Let's compile our project with the following command –
ng serve
The ng serve command will build the application and starts the web
server.
Once the project has been completed, you will get the output that was completed Successfully , as shown in the image
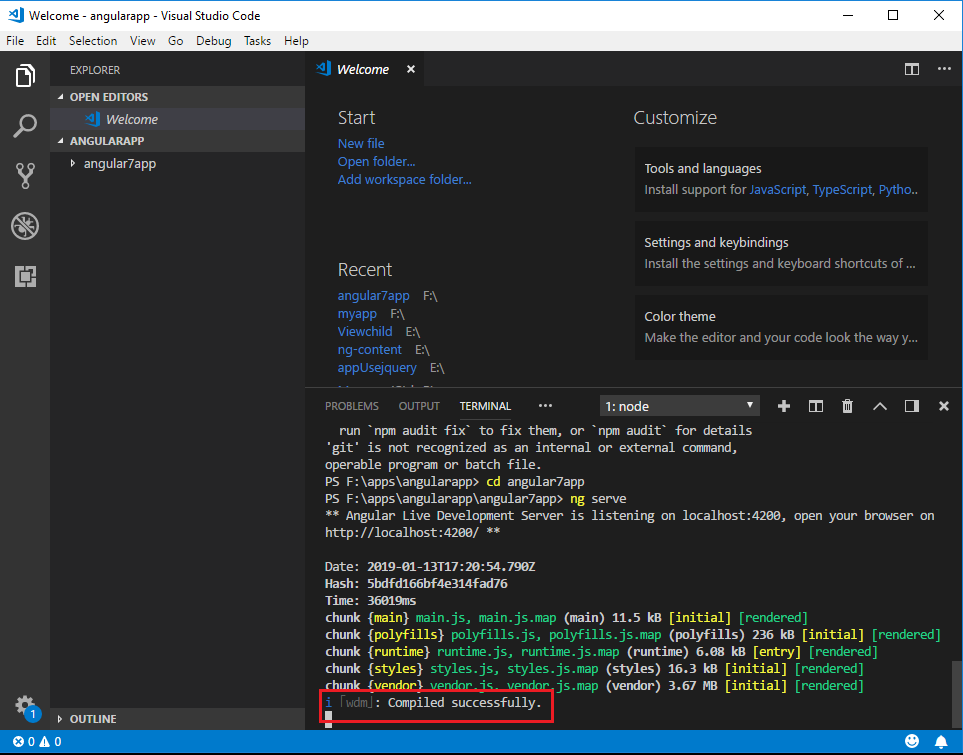
The Web server starts at port 4200. Enter the URL http://localhost:4200/
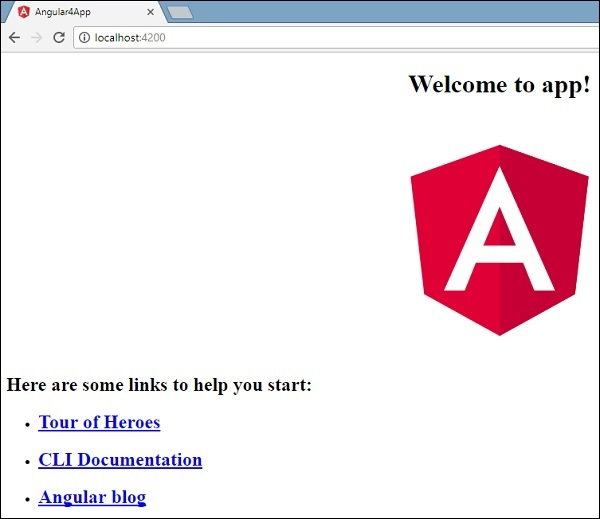
in the browser and you will be directed to the following screen:
